Friday 20 June 2014

insert,update,delete and select using partial view in MVC4

Creating ASP.NET MVC 4 Application

  1. Let us create a sample application by selecting ASP.NET MVC4 Web Application template and give it project name as CRUDWithAjax and click ok.Choose Application Template for ASP.NET MVC4
  2. Select a template as Basic Application. Visual Studio 2012 adds a CRUDWithAjax project in the solution as shown below in the screenshot:Choose Application Type
  3. Expand Content and Scripts folder. You will get all required jQuery, jQueryUI libraries and all CSS files inContent folder as shown below:Initial Project Structure
    As a good practice, we should not include the files which we are not using in the application. So let’s remove unnecessary files from Scripts and Content folder. Look into the below screenshot what we need and remove all other files in Scripts and Content folder.
    Required Files
  4. Open App_Start folder. Remove WebApiConfig.cs from this folder since we are not doing anything related with WebApi in this application.
  5. Open BundleConfig.cs file and remove unnecessary code from this file. Now code looks as given below:
    public static void RegisterBundles(BundleCollection bundles)
    {
        bundles.Add(new ScriptBundle("~/bundles/jquery").Include(
                    "~/Scripts/jquery-{version}.js"));
                    
        bundles.Add(new ScriptBundle("~/bundles/jqueryui").Include(
                    "~/Scripts/jquery-ui-{version}.js"));
                    
        bundles.Add(new StyleBundle("~/Content/css").Include("~/Content/site.css"));
        bundles.Add(new StyleBundle("~/Content/themes/base/css").Include(
                    "~/Content/themes/base/jquery-ui.css"                
                    ));
    }

Creating XML File as DB and Training Repository

  1. Add Training.csITrainingRepository.cs and TrainingRepository.cs file under Models folder. Write code as written in downloaded files.
    Training.cs file has the properties of Training entity.
    ITrainingRepository is an interface that has methods which we will need to perform CRUD operation.
    We need to implement those methods in TrainingRepository.cs file. Inside the constructor ofTrainingRepository.cs file, path is given to Trainings.xml physical location. Here, Trainings.xml is working as a database.
  2. Add Trainings.xml file to App_Data folder as shown below:TrainingXML File
    Add data to Tranings.xml file as given in the downloaded code. Sample data is shown below:
    Training data in XML File

Implement Action Method and View

  1. Add a controller by right clicking on Controller folder, give it name as Home. Create the instance ofTrainingRepository class and use this object to perform CRUD operations.
  2. In HomeController.cs file, add the following code in Index action method to return Index view filled with trainings.
    public ActionResult Index()
    {
        List<Training> allTrainings = _trainingRepository.GetTrainings().ToList();
        return View(alltrainings);
    }
  3. Add a view by right clicking on Index() action method, Index.cshtml file is being added to Views -> Home folder. To display our trainings on Index.cshtml file, write the following code:
        @model <IEnumerable<CRUDWithAjax.Models.Training>
       
        <html>
        <head>
            <title></title>
            <script src="~/Scripts/appjs/jquery.timepicker.min.js"></script>
            <link href="~/Content/appcss/custom-style.css" rel="stylesheet" />
            <link href="~/Content/appcss/jquery.timepicker.css" rel="stylesheet" /> 
        </head>
        <body>
            <div  class="pageHeader" >
               <h2>Manage Trainings</h2>
            </div>
            <table id="tbltraining" class="tblStyle">
                <tr  class="tblHearerRow">
                    <th class="tblHearerCell" >Name
                    </th>
                    <th class="tblHearerCell">Instructor
                    </th>
                    <th class="tblHearerCell">Star tDate
                    </th>
                    <th class="tblHearerCell">End Date
                    </th>
                    <th class="tblHearerCell">Start Time
                    </th>
                    <th class="tblHearerCell">Duration
                    </th>
                    <th class="tblHearerCell">Actions
                    </th>
                </tr>
                @foreach (var item in Model)
                {
                    <tr class="tblRow">
                        <td id="itemId" class="itemIdClass tblColumn">
                            @Html.TextBoxFor(modelItem => item.ID)
                        </td>
                        <td class="tblColumn">
                            @Html.DisplayFor(modelItem => item.Name)
                        </td>
                        
                        <td class="tblColumn">
                            @Html.DisplayFor(modelItem => item.Instructor)
                        </td>
                        <td class="tblColumn">
                            @Html.DisplayFor(modelItem => item.StartDate)
                        </td>
                        <td class="tblColumn">
                            @Html.DisplayFor(modelItem => item.EndDate)
                        </td>
                        <td class="tblColumn">
                            @Html.DisplayFor(modelItem => item.Time)
                        </td>
                        <td class="tblColumn">
                            @Html.DisplayFor(modelItem => item.Duration)
                        </td>
                        <td class="tblColumn">                   
                            <input type="button" value="Edit" 
                            class="buttonEdit btnStyleOne" />
                            <input type="button" value="Delete"  
                            class="buttonDelete btnStyleOne" />
                        <td>
                    </tr>
                }
            </table>
                <div class="btnStyleTwo">           
            <input type="button" value="Create new Training" 
            class="buttonCreate btnStyleOne" />
            </div>
        </body>
        </html>
    Here, using foreach function, we are iterating over the Model which is a list of trainings to display the data in a tabular form.
  4. Content folder has two files, custom-style.css and jquery.timepicker.css. Those files are having all styles related information. As of now, Index.cshtml is using only custom-style.css file. jquery.timepicker.css will use them later.Content Folder
  5. Now run the application. Hope you will get a similar screen as shown below:Final Output Page
    Here, you will get all trainings available in your XML database. But Create, Edit and Delete button is not working. In the next part, we will implement functionalities to achieve Create, Edit and Delete operations. 
  6. Implement Create Operation

    1. Let us create a partial view by right clicking on Shared folder. Give it name as CreatePartialView, make it strongly typed by checking the checkbox for “Create a strongly-typed views” option, select training model and check the checkbox “Create a partial view” option, as shown below:Add a Partial View to Project
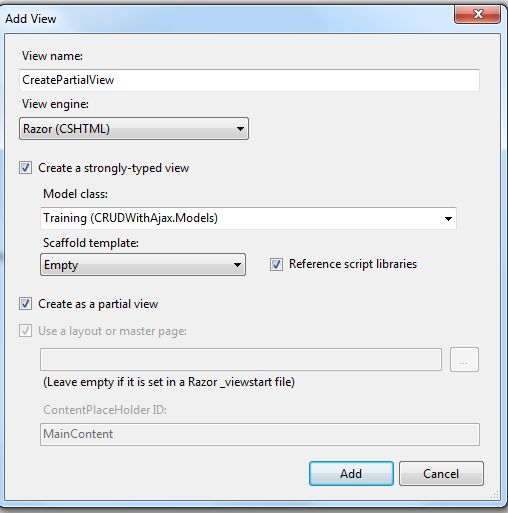
      CreatePartialView.cshtml file will be added to the Shared folder. Now, we can use this partial view anywhere. Please find the code written in CreatePartialView.cshtml in downloaded code and add similar to those in this file.
    2. In Index.cshtml file, just after the table closing tag, add the following code as shown below:
      <div id="createForm"></div>
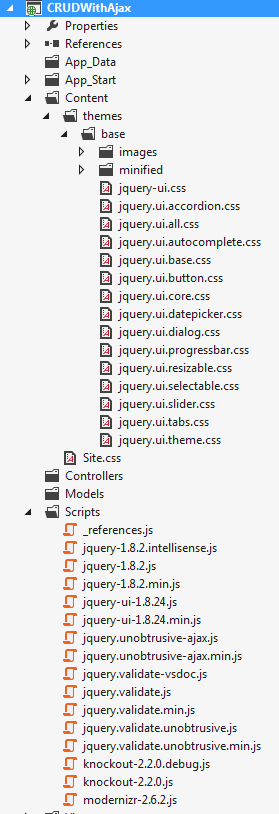
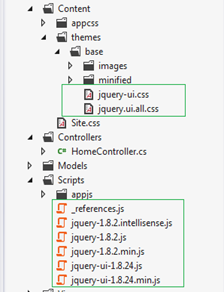
    3. Add appjs folder in Scripts folder and add index.js file under new appjs folder. For selecting the time, will usetimepicker. To create timepicker, we have downloaded a plugin to create jQuery timepickerfrom here. Add downloaded jquery.timepicker.min.js as shown below:Adding TimePicker js file
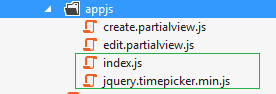
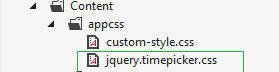
      And add downloaded jquery.timepicker.css to appcss folder under the Content folder as shown below:
      Adding TimePicker css file
    4. Open index.js file and write the following code:
      var selectedId = 0;
      $(document).ready(function () {
          $(".itemIdClass").hide();
          $("#deleteForm").hide();
      });
      //jQueryUI method to create dialog box
      $("#createForm").dialog({
          autoOpen: false,
          modal: true,
          width: 450,
          title: "Create Training"
      });
      Here selectedId is a variable that is initially assigned to zero.
      $(".itemIdClass").hide();: This code will hide TrainingId column from table.
      $("#createForm").dialog();dialog() is a jQueryUI method that will create a dialog box to show the Create Training form.
    5. On Create training partial view, we want to show instructor list as dropdown to select a instructor. For this, we have written the following code in CreatePartialView.cshtml file to bind instructor list to the select tag.
      <select id="selectInstructor">
          <option selected="selected">Select Instructor </option>
      </select>
    6. Add create.partialview.js under the appjs folder and write the following code in create.partialview.js file. Do not forget to give the reference for create.partialview.js on CreatePartialView.cshtml file.
      $(document).ready(function () {
             //Create jQuery timpicker
              $("#timepicker").timepicker();
                 //Create jQueryUI datepicker
                 $("#startdatepicker").datepicker();
                 //Create jQueryUI datepicker
                 $("#enddatepicker").datepicker();
                 
                 $.ajax({
                  //Call GetInstructorList action method
                  url: "/Home/GetInstructorList",
                  type: 'Get',
                  success: function (data) {
                      $.each(data, function (i, value) {
                          $('#selectInstructor').append
                          ($('<option>').text(value).attr('value', value));
                      });
                  }
              });
          });
    7. In HomeController, write the following code:
      [HttpGet]
      public JsonResult GetInstructorList()
      {
          var allInstructors = _trainingRepository.GetInstructor().ToList();
          return Json(allInstructors, JsonRequestBehavior.AllowGet);
      }
      [HttpGet] is an attribute used to get the data. GetInstructorList method returns Instructorslist as json form.
    8. In index.js, use jQuery Ajax method to call CreatePartialView() action method.
      $("#buttonCreate").button().click(function () {
          $.ajax({
             //Call CreatePartialView action method
             
              url: "/Home/CreatePartialView",
              type: 'Get',
                 success: function (data) {        
                  $("#createForm").dialog("open");
                  $("#createForm").empty().append(data);
                  $("#editForm").hide();
              },
              error: function () {
                  alert("something seems wrong");
              }
          });
      });
    9. Inside the HomeController, add the following code as shown below:
      [HttpGet]
      public ActionResult CreatePartialView()
      {
          return PartialView("CreatePartialView");
      }            
      CreatePartialView is an Action method whenever it will be called will returnCreatePartialView.cshtml file.
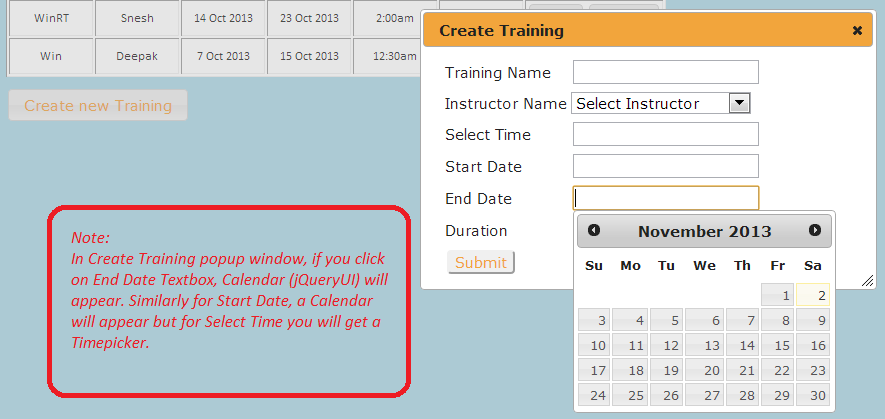
    10. When you click on Create new Training Button, Create Training form will open as a dialog box as shown below:Create Training Popup
    11. Submit button is not working now, so let us implement the functionality to create a new training. Opencreate.partialview.js file and write the following code to send new training to the server.
      $("#submit-button").click(function () {
          // On submit button click close dialog box
          $("#createForm").dialog("close");
          
          //Set inserted values
          var name = $("#trainingname").val();
          var selectInstructor = $("#selectInstructor").val();
          var startdatepicker = $("#startdatepicker").val();
          var enddatepicker = $("#enddatepicker").val();
          var timepicker = $("#timepicker").val();
          var duration = $("#duration").val();
          
          // Call Create action method
          $.post('/Home/Create', { "name": name, 
          "instructor": selectInstructor, "startdate": startdatepicker, 
                                   "enddate": enddatepicker, 
                                   "time": timepicker, "duration": duration },
              function () {
                  alert("data is posted successfully");
                  window.location.reload(true);
                  
               });
      });            
    12. In HomeController, write the following code to call InsertTraining() method of repository to save data in an XML file.
      [HttpPost]
      public void Create(Training training)
      {
          _trainingRepository.InsertTraining(training);
      }            
      [HttpPost] is an attribute used to post the data. Create method accepts the newly created training object. Then call InsertTraining() method is implemented in TrainingRepository.cs file.
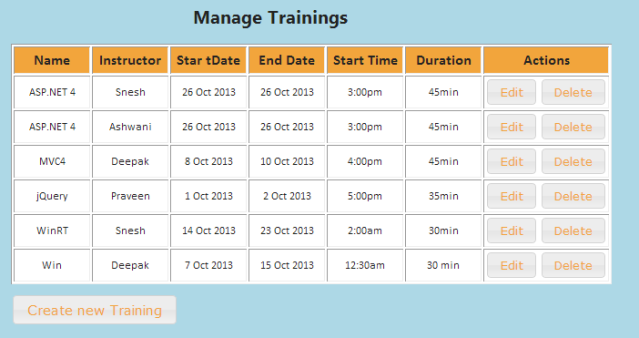
    13. Run the application, click on “Create new Training” button, a dialog box will open.
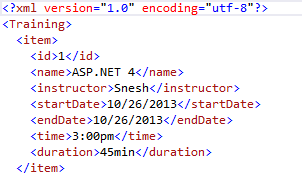
    14. In “Create Training” popup, fill the form and when you click on submit button, data will be saved finally inTrainings.xml file. As of now, there is no validation logic for the given value.

    Implement Edit Operation

    1. Add a Partial View named as EditPartialView.cshtml to Shared folder to make it strongly-typed.
    2. Write the same code as written in downloaded EditPartialView.cshtml file.
    3. Add the following tag just after the createForm div tag:
      <div id="editForm"></div>
    4. Add the following code in index.js file to create dialog box to show edit training form:
       //jQueryUI method to create dialog box
              $("#editForm").dialog({
                  autoOpen: false,
                  modal: true,
                  width: 450,
                  title: "Edit Selected Training"
              });            
    5. Add edit.partialview.js under the appjs folder and write the following code in edit.partialview.js file. Do not forget to give the reference for edit.partialview.js on EditPartialView.cshtml file.
      $(document).ready(function () {
          //Create jQuery timpicker
          $("#edittimepicker").timepicker();
            //Create jQueryUI datepicker
              $("#startdatepicker").datepicker();
              $("#enddatepicker").datepicker();
              $.ajax({
                  url: "/Home/GetInstructorList",
                  type: 'Get',
                  success: function (data) {
                      $.each(data, function (i, value) {
                          ('#editselectInstructor').append($
                          ('<option>').text(value).attr('value', value));
                      });
                  }
              });
          });
          
          $("#update-button").click(function () {
              $("#editForm").dialog("close");
              
              var id = $("#traininId").val();
              var name = $("#name").val();
              var instructor = $("#editselectInstructor").val();
              var startdatepicker = $("#startdatepicker").val();
              var enddatepicker = $("#enddatepicker").val();
              var timepicker = $("#edittimepicker").val();
              var duration = $("#duration").val();
           // Call Edit action method
              $.post('/Home/Edit', { "id": id, "name": name, 
              "instructor": instructor, "startdate": startdatepicker, 
                                      "enddate": enddatepicker, 
                                      "time": timepicker, 
                                      "duration": duration }, function () {
                  alert("data is posted successfully");
                  window.location.reload(true);
              });
          });            
    6. In HomeController, write the following code:
      [HttpGet]
          public ActionResult EditPartialView(string id)
          {
              int selectedTrainingId = Convert.ToInt32(id);
              Training selectedTraining = _trainingRepository.GetTrainingByID(selectedTrainingId);
              
              return PartialView("EditPartialView", selectedTraining);
          }
          
      [HttpPost]
          public void Edit(Training training)
          {
              _trainingRepository.EditTraining(training);
          }
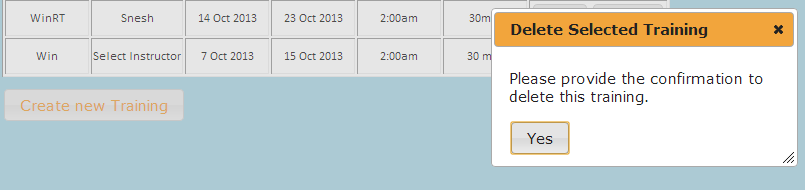
    7. Run the application, click on Edit button Edit Training dialog box will open as shown below:Edit Training Popup
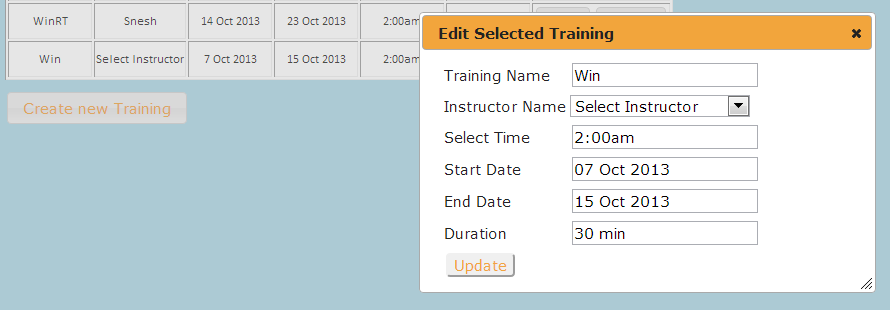
    8. Edit the training, when you click on Update button, updated data will be saved in Trainings.xml file.

    Implement Delete Operation

    1. Let us implement functionality to delete training. When we click on Delete button, we want to show confirmation dialog box. To do that, first write the following code in Index.cshtml file:
      <div id="deleteForm">
          <p>Please provide the confirmation to delete this training.</p>
          <input type="button" value="Yes" class="okDelete btnStyle" />
      </div>            
    2. Add the following code in index.js file to create dialog box to show edit training form:
      //jQueryUI method to create dialog box
      $("#deleteForm").dialog({
          autoOpen: false,
          modal: true,
          title: "Delete Selected Training"
      });            
    3. Write jQuery click function, this function will be called when Delete button will be clicked:
      $(".buttonDelete").button().click(function () {
          //Open the dialog box
          $("#deleteForm").dialog("open");
          //Get the TrainingId
          selectedId = $(this).parents('tr:first').children
          ('td:first').children('input:first').attr('value');
      });            
    4. Click on Delete button. Hope you will get the similar screen as shown below:Delete Training Popup

2 comments: